It’s that time again. A new release of APEX brings an updated IG Cookbook. Try out APEX 19.2 at apex.oracle.com and then download release 6 of the IG Cookbook for 19.2. If you are still using an older version of APEX you can try a previous IG Cookbook release. As always make sure you install the Sample Interactive Grids app first because it creates some needed tables.
What’s new in Interactive Grid
The main addition to Interactive Grid in 19.2 is support for remote data sources. Interactive Grid was migrated to use the APEX_EXEC infrastructure so it now supports Local Database including PL/SQL Function Body returning SQL Query, REST Enabled SQL service, and Web Source module sources. Carsten worked on this feature. I don’t know of any examples using external data sources with IG yet. Using remote data sources should be straight forward especially if you are used to using them with other reports or forms. Editable interactive grids using REST Enabled SQL is the easiest. Writing data back to a Web Service has similar concerns as for a form region. The Web Service needs to support write methods such as PUT, POST, and DELETE and the Web Source module needs to be configured to use these methods. Details on how to do this is a topic for someone else.
This IG feature and the new Faceted Search helped make APEX_EXEC more robust and mature and even added some minor functionality. APEX_EXEC is helping to unify capabilities across a number of regions. For example the Oracle TEXT support that was in Interactive Grid influenced APEX_EXEC and that brought Oracle TEXT support to Interactive Report and Faceted Search.
More than 23 bugs were fixed and new JavaScript APIs were added or newly documented. Check out the release notes for details.
One of the focus areas of improvement is in editing. Two key bug fixes and a subtle change in behavior in the jQuery library required a substantial reworking of the way cells are activated and deactivated in edit mode. This was an opportunity for other fixes and enhancements in this area.
One of the bugs had to do with changes to the last edited cell not always being saved. This was a tough bug to reproduce. For some people it happened frequently and for others, myself included, it almost never happened. It turned out to be a timing race condition. The solution was to remove the dependency on timing and to add a new method finishEditing to the base widget that any save action can use to make sure that a model view is done editing the current cell/field.
The other bug was that multiple selection didn’t work while in edit mode. I was a bit surprised that people would even try this. The workaround of leaving edit mode seemed reasonable but it was a serious issue for some people. To make selection work well while in edit mode meant to also support selection with the keyboard and also when the checkbox control is hidden. It does require that the row header at least be present. What hasn’t changed is that all arrow keys including Shift and Ctrl key modifiers are given to the currently active cell and are not used for changing the selection. You can click on the row header or the row header checkbox to change the selection. If there is no checkbox control then the Shift and Ctrl key modifiers work with click in the row header just as they do when in navigation mode. When focus is in the selection row header the up and down arrow keys along with the Shift and Ctrl keys can be used to change the selection. Focusing a cell in a new row, with keyboard or mouse, that is not already selected will select that row and deselect all others just like in navigation mode.
Other edit mode changes:
- A number of issues where focus would get lost or tab stops would get confused have been fixed.
- The floating item used when an item doesn’t fit in a cell is now moved to the end of the document (just like menus and dialogs) so that it is not clipped by any containing element. It avoids cases where a horizontal scroll bar could be shown while the floating item is open. Issues with dragging the floating item are fixed and it remembers where it was dragged to.
- Read only columns are now visually shown as not editable. No more need for the trick of adding class “is-readonly” in this case.
- An advanced grid option
skipReadonlyCellswas added. When this option is true Tab and Shift-Tab will skip over cells that are read only.
In the course of fixing a bug in Unselect All behavior the grid is now more strict that collapsed (hidden) rows cannot be selected. A new option allowSelectHidden provides a way to change this default behavior; when true collapsed rows can be selected. In addition, now when all current rows are selected (select all is checked) and scroll paging renders more rows the added rows are also selected.
A few small enhancements were made to the tableModelView and iconList widgets that implement icon view in Interactive Grid and the single column results view in the new Popup LOV. The iconList widget now supports interactive content such as having multiple links in a single item. This was needed by the new Team Development issues IG pages. Check out the new iconList tabbableContent and noNavKeyContent options. The new team development is another good example of what can be done with IG. Note that Icon view, with a customized icon and label, is the primary view with grid view taking a backseat role. You can see how it is configured by looking at the page source and by typing code such as the following into the browser console on page 4600:1.
apex.region("issues").call("getViews").icon.view$.tableModelView("option")
In the Popup LOV results notice that the up/down arrow keys move seamlessly into the results list. This required a new option constrainNavigation for the grid and tableModelView widgets (currently only documented for tableModelView). This advanced option won’t be needed by most people but it is available for anyone creating a custom component where the arrow keys need to move focus in or out of the grid or list.
A few regressions were found too late to get fixed. Check out the known issues page for details.
What’s new in the IG Cookbook
Four new example pages were added and a few others were fixed and/or improved. Together the Sample Interactive Grids, Sample Master Detail, and IG Cookbook provide at least 73 examples of the wide range of possibilities Interactive Grid can bring to your APEX apps.
The new pages are:
- UI Options: This shows some new (and old) advanced grid options that affect UI behaviors. The options are: Skip read only cells, Allow selecting collapsed rows, Hide deleted rows, and Collapsible control breaks.
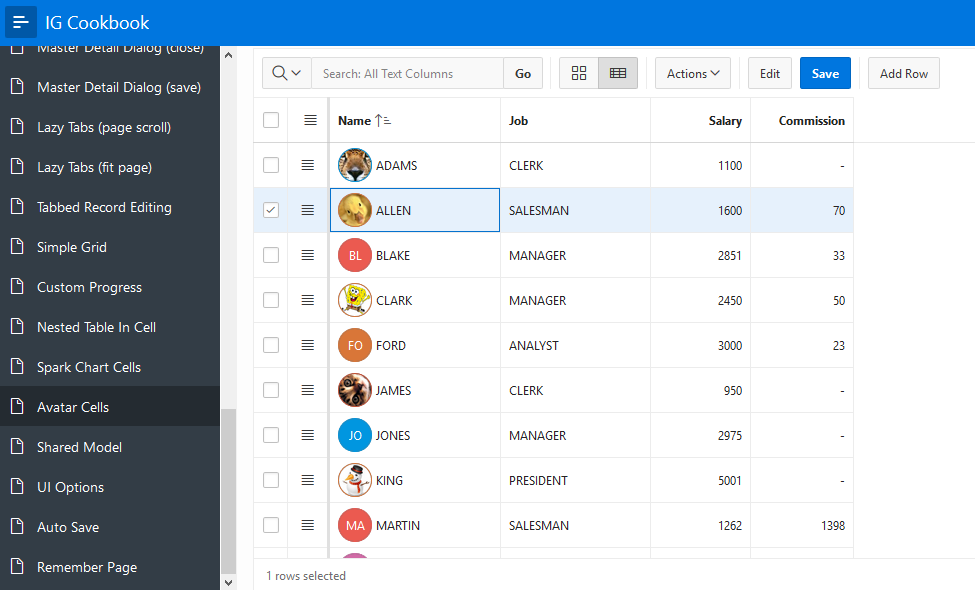
- Avatar Cells: Shows putting the JET Avatar element in a grid cell and in icon view. This is similar to using the JET Spark Chart which I previously wrote about. Now that the JET knockout dependency issue is resolved in the new version of JET that APEX is using
oj-avatarelements can be easily used in APEX. This is the page shown in the screen shot at the start of this article. To try this out you will need to find URLs to some avatar images. Enter these URLs in the Avatar Url column and press the Save button. - Auto Save: Demonstrates a few different ways of automatically saving edits.
- Remember Page: When an IG that uses traditional paging branches to another page and that page links back to the IG page the user expects to return to the same report page they were on. But it doesn’t currently work that way. It turns out that creating a robust workaround for remembering the page is quite tricky. This page offers a good starting point for a workaround.
On the IG Cookbook home page you can read the change log for this release. It lists what pages have been updated.
One updated and improved page that I want to call attention to is Edit in Dialog. Someone tried using this example and found that if any of the columns had a cascaded defined it did not work in the dialog. The reason for this is that information about the column and region that the server needs in order to identify the column(s) specified in the Items to Submit attribute is missing in the ajax request. (It is an interesting exercise to compare the select list cascade ajax requests between a page item and a column item.) The same issue applies to DA actions such as Execute PL/SQL Code that send items to the server. The cause and solution to this problem sheds light on the mechanism used to send Items to Submit column items to the server. It is a detail that most APEX developers can remain blissfully unaware of but for plug-in developers it is important to understand and unfortunately some parts are not documented.
Both Cascading LOVs and DA actions that execute on the server involve sending current item values to the server. For a page item this is straight forward because items have a name that is unique to the page. Column items do not have a unique name. You can give them a static id (remember that all static ids, no matter the component must be unique on a page) but that is for your convenience in use from JavaScript. For the server to find and use a column item it needs information about the region as well as the column name and value. But an item doesn’t know if it is used as a page item or a column item and it doesn’t know what region it is in. Regions shouldn’t know or be involved with low level item behavior like cascade or DA actions and items shouldn’t know what region they are in. Yet the server still needs to know in order to find and verify the column. So how does this work?
The first step is that any item that can be a column item and sends an ajax request that can include items to submit needs to add the target option to the apex.server.plugin call. This new target option is documented but the big picture of why it is needed may not have been clear. For example native Select List items do this and DA actions also set the target as needed.
The next step is that the apex.server.plugin implementation needs to use this target to find the region and ask the region for the needed session context information. This uses the documented apex.region.findClosest function and the undocumented region interface method getSessionState. This method needs to be implemented by any region that supports column items and currently this is only the Interactive Grid region. It is also needed if you try to use IG column items outside of the IG region they belong to, as is the case with this example page. Take a look at the implementation of getSessionState in the Edit in Dialog page.
Another change to the Edit in Dialog page is that layout of fields in the dialog has been customized. The dialog uses the same recordView widget as single row view and people sometimes ask about customizing single row view. This example should give some ideas of what is possible.
I hope you find the 19.2 Interactive Grid improvements and these new IG Cookbook examples useful.
There is a regression in 19.2 where IG in an editable inline dialog region (or popup) doesn’t display floating edit cells. (page 25 for example).
Add this code to page Function and Global Variable Declaration:
if ( $.ui.dialog ) {
$.widget( “ui.dialog”, $.ui.dialog, {
_allowInteraction: function( event ) {
return $( event.target ).closest( “.a-GV-floatingItem” ).length > 0 || this._super( event );
}
});
}
Also add the following to page attribute CSS Inline:
.a-GV-floatingItem.is-expanded {
z-index: 2020;
}
The above can also go in application .css and .js files.
@Maria master as simple form is not something that is built-in. The closest easy option is page 17 of Sample Master Detail app. It uses a IG region forced into single row view. Beware a regression bug in 19.2. from known issues https://www.oracle.com/technetwork/developer-tools/apex/downloads/apex-192-known-issues-5811831.html
The other option is to create your own form backed by a hidden IG. Imagine something like cookbook Split Grid and Form where the master IG is completely hidden but used to back the custom form.
Is there a capability to create a real master-detail form as in Oracle Forms?
The master to be a single row form and the details a grid? Both with add a new record and apply changes?
@tony Rather than use an HTML Element type use a Text Field with advanced attribute cellTemplate. There are a few examples like this in the cookbook. See page 37 for example.
How do you in an interactive grid, do filtering on a column that uses a type of html-element? Do I need an additional column that uses a text field type ? Please advise
Hi,
Page 11 does not work. It would seem that Task.js is missing
Thanks
I am currently working with 19.1 but will most likely move to 19.2 in the next couple days or weeks at the most.
I am working on a projet portfolio application and I was curious and interested with the Double grid in your previous Cookbook. In my case, the first grid would be to change the project priority and the second one would be to display the project in it’s new position.
I would need some advice though on the following :
1 -The two grids need to be side by side
2-The first grid needs to be refreshed but focus needs to be set on the following line.
3-The second grid needs to set focus on where the line where the project now appears.
Would also be nice to have a button on the line that says “Move it” or something like that.
Is this at all possible.
@imran The cookbook has an example of showing/hiding columns on page 16 Simple Control.
I need to know how can I hide/show multiple column headers in interactive grid.
Background:
1: Grid is base on Table
2: I declare grid and assign it a static id: grdld
3: static id assign to columns which I need to hide Like: ao01, bo01, co01, do01, eo01 etc …
Now kindly guide me how can I hide and show column using a button
It will work fine but I need with column name not with number
//$(“#grdld tbody td:nth-child(5), #grdld thead th:nth-child(5)”).hide();
//$(“#grdld tbody td:nth-child(6), #grdld thead th:nth-child(6)”).hide();
Regards,
Thanks for a detailed explanation about Grid