My daughter, Isabella, and I made twenty fidget spinners with wood and old skate bearings for Christmas presents. I tweeted the steps with pictures but here is a little more detail about how we turned old skate bearings into wood fidget spinners.
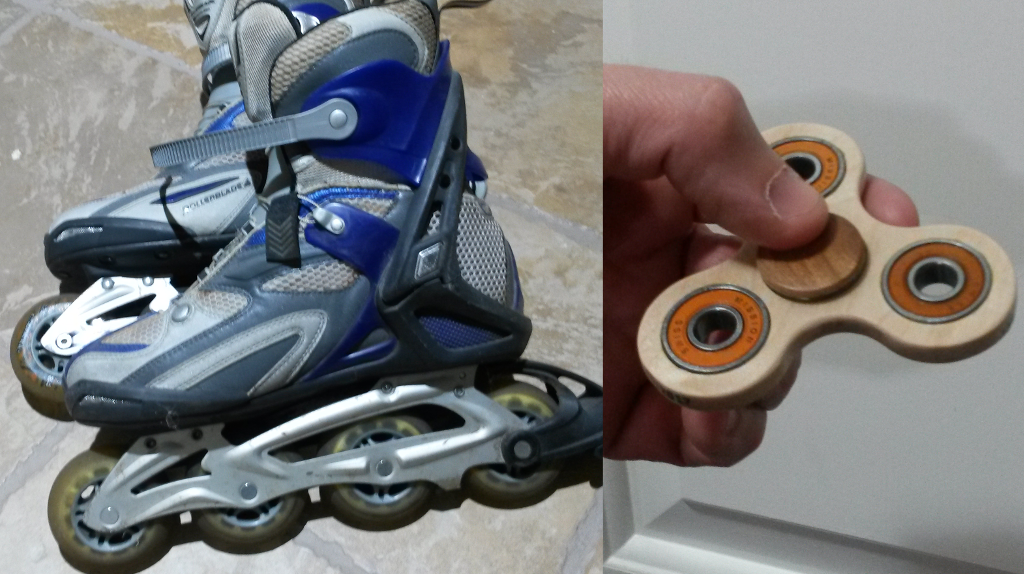
Since the early 90’s I have been inline skating (although in the last few years I have switched to an Elliptigo bike) and every time I changed my bearings I would toss the old ones in a box because you never know… Sometime this year I became aware of fidget spinners and realized that I may finally have a use for those old bearings. I suggested to Isabella that we make them for Christmas gifts and she was totally onboard.
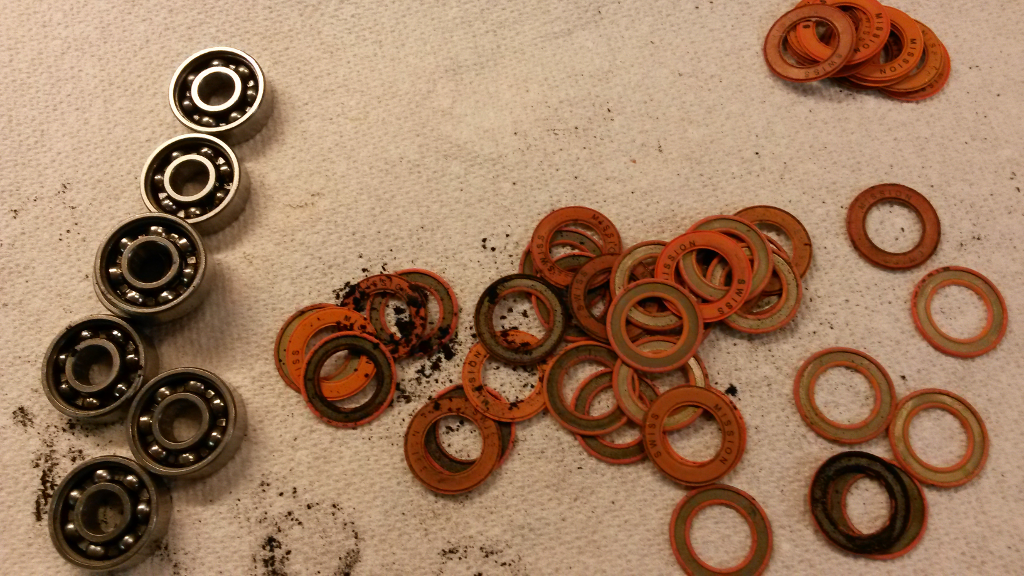
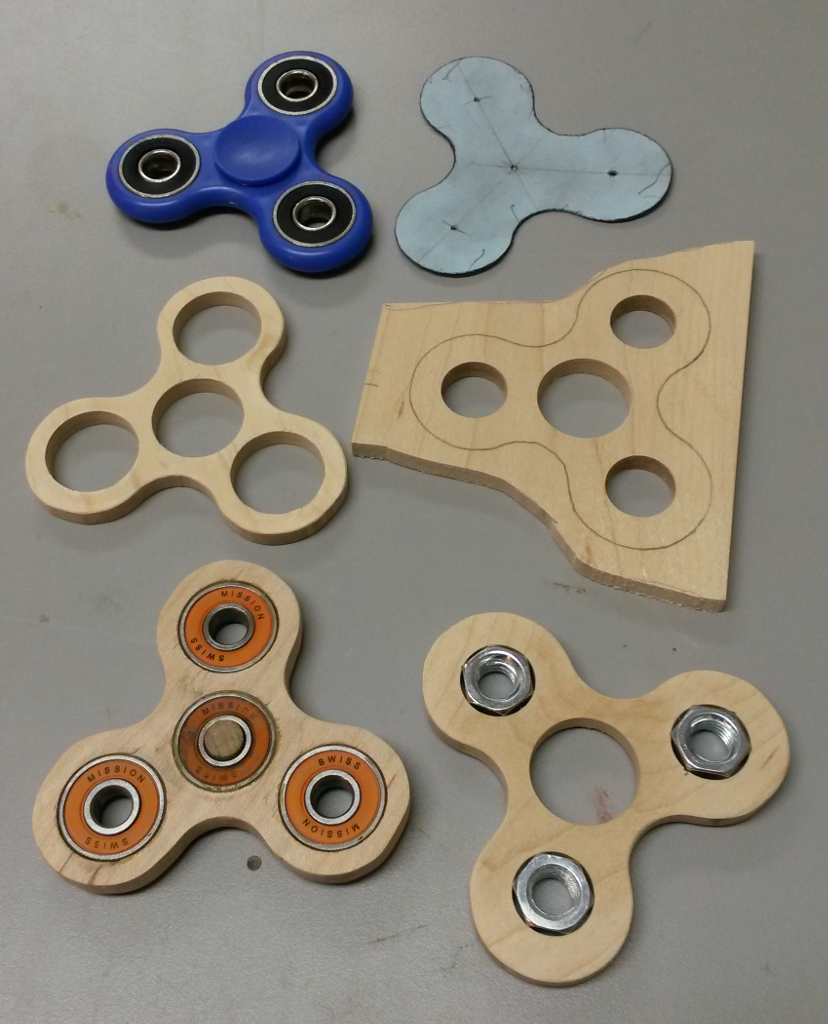
Used bearings will be very dirty and need cleaning. You can find instructions for cleaning bearings online. Basically take one or both shields off and rinse with turpentine then dry, oil and put the shields back on. I used sewing machine oil rather than skate oil because I think the lighter oil will help them spin better and they don’t need to endure the same stress as they would in a skate. I had 4 different kinds of bearings. Pick the ones that spin best for the center. You can make more spinners if you use something other than bearings for the 3 weights. We used nuts for some so that we could get 20 spinners from 62 bearings (14 * 4 = 56 bearings. 6 * 1 bearing, 3 nuts = 6 bearings, 18 nuts). I just happened to have enough nuts already. They were a little thicker than the wood spinner bodies and a little lighter and smaller diameter than the bearings but still work well and give the spinner a unique look.
Use card stock to make a template. No scale or ruler is needed; just a compass, T-square, and 30-60-triangle. Use the compass to transfer measurements from a store-bought spinner. Trace and mark hole centers on 1/4″ hardwood board. We used maple and oak.
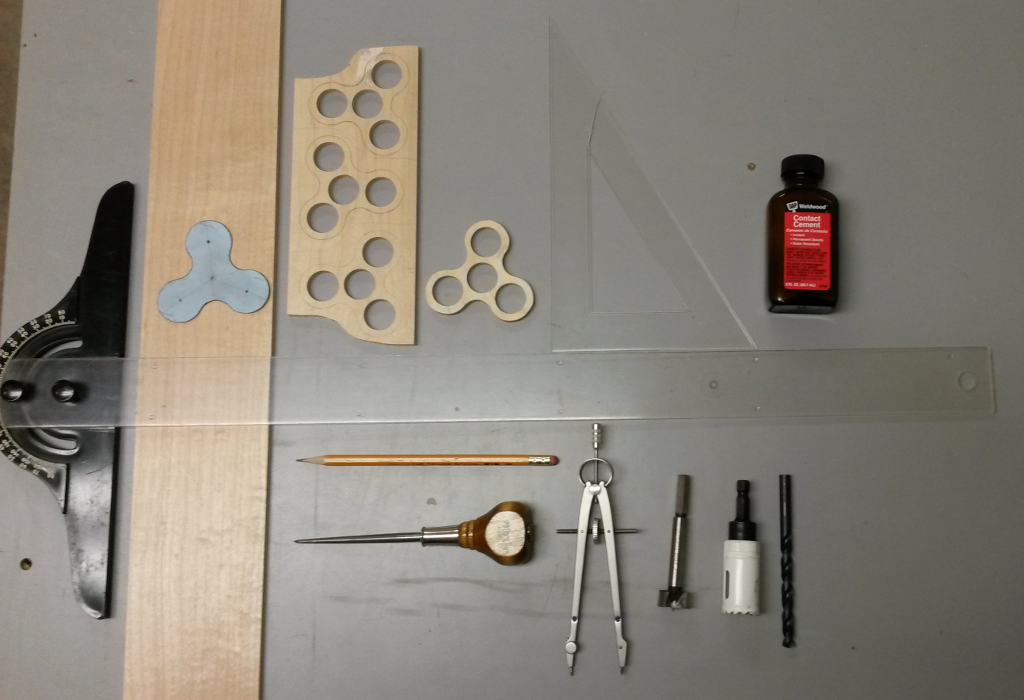
Drill holes with a 7/8″ Forstner Bit using a drill press. Using a Forstner bit is important because it makes a clean hole with very little tear out. If you use something else for the weights then a different diameter may be needed. Try to be accurate marking and drilling the holes because being even a little off will cause the spinner to wobble. (Some of ours have a slight wobble.)
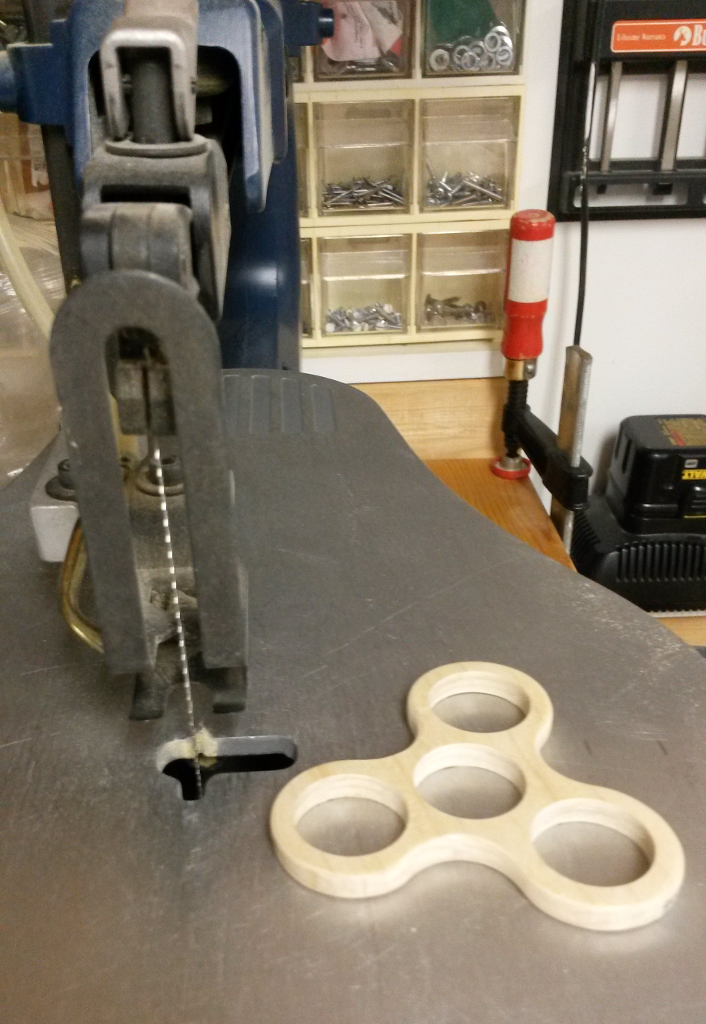
Carefully cut out the body with a scroll saw. The more accurate the cut the less sanding needed later.
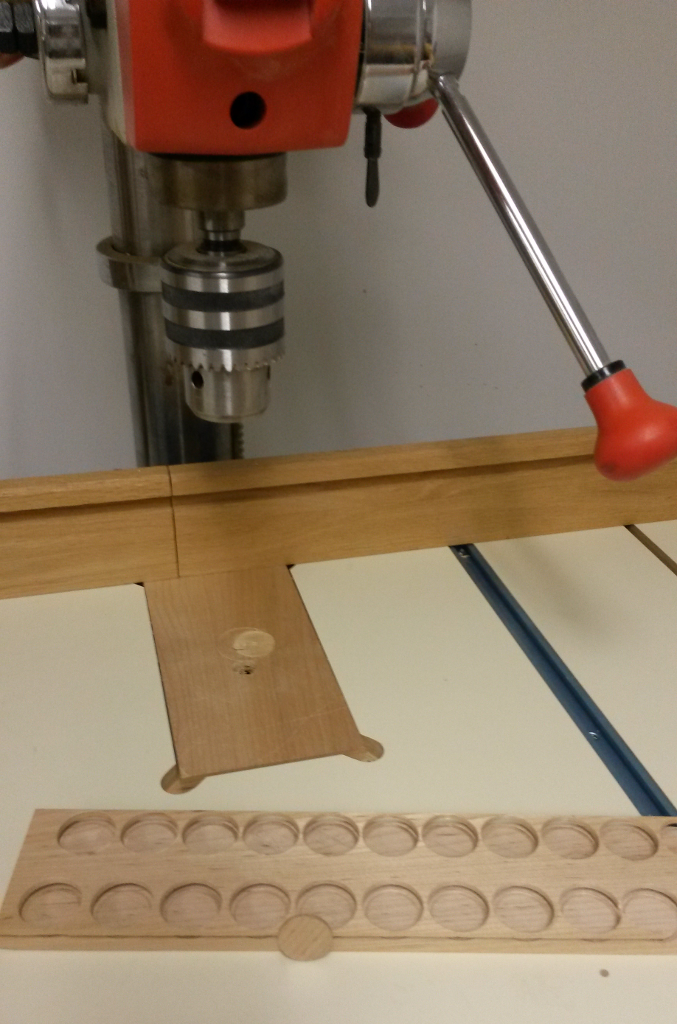
The two disks on either end of the axle that the fingers hold we call buttons. You can make buttons with a hole saw drill bit. These are measured by the outer diameter but you are interested in the inside. I think a 1″ bit gives about 7/8 diameter button. (Slightly larger would be better if you have that size bit.) Drill a little more than half way through a 3/4″ board then cut a thin slice (just under 1/8″) on the table saw. We used maple and cherry for the buttons.
The axle is a 5/16″ dowel cut just a little bit longer than the thickness of the spinner body (about 5/16 to 3/8″). Use a miter box to ensure a 90 degree cut so the buttons will be parallel. I don’t have a general purpose miter box so I made a jig for this as shown below.
One part of wood working that I enjoy is making jigs, templates and tools that help make the project. The following pictures shows the miter jig already mentioned, some sanding blocks, and a jig for aligning the buttons.
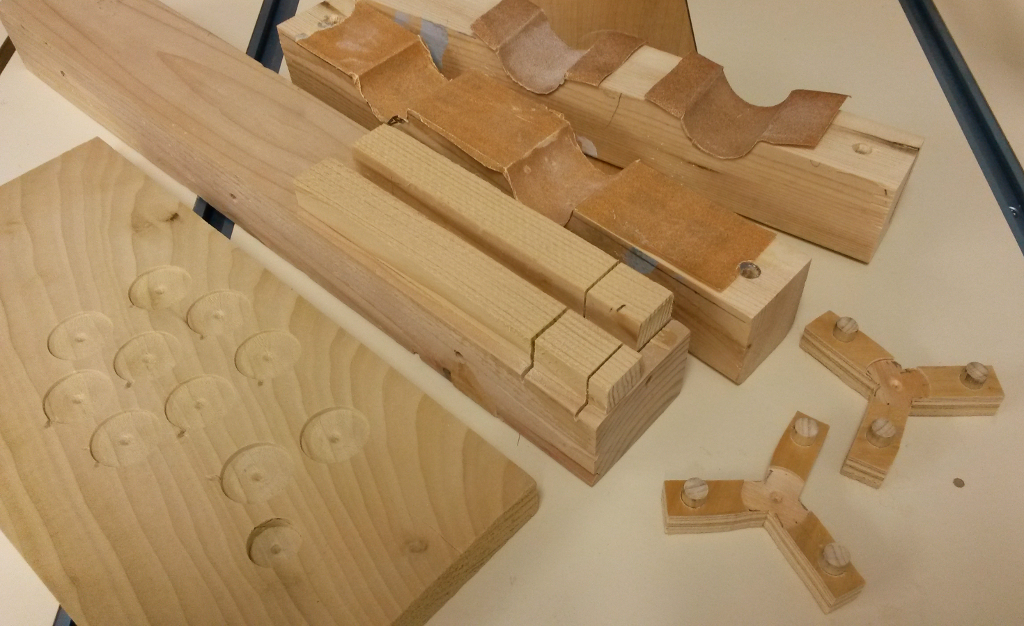
To get smooth curved sides I made a custom sanding block. I drilled holes just a bit bigger than the outer diameter of the body in scrap 2×4 then cut it in half and glued sandpaper to it.
The 3 prong jigs hold buttons in place when gluing and clamping. This was not too successful because the holes didn’t line up perfectly. It worked great for some but not others. In the end I aligned most of the buttons by eye. What would have been ideal is to have a very shallow 5/16 diameter hole in the exact center of the button that the axle would sit in. It would make it stronger and better aligned but I could not find a way to do this with the tools I had available.
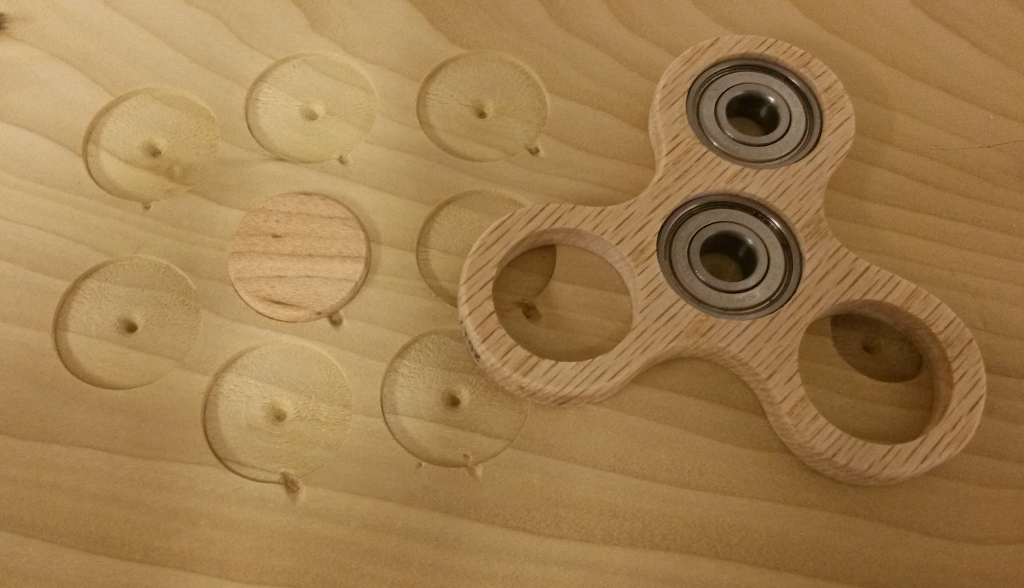
The next step is lots of sanding. This jig holds parts in place for sanding with a random orbit sander. The shallow holes hold the buttons in place. Holes with a bearing in them keep the body in place. We used a drum sanding drill bit that was just the right diameter for the concave curve of the body.
I like to sign and date the things I make (sometimes I forget). Usually I put my initials and date on the back or underside of the project with a wood burning tool. The spinners are a little small for that so I tried printing (with an inkjet printer) our initials and the year on transparent label stickers. These are cut and stuck on the sides of the body. This worked OK but not great. In a few cases the ink smudged or came off when polyurethane was applied. When this happened I just took the sticker off and put on a new one. There is also some slight cracking once the poly dries. We applied two coats of polyurethane with sanding in between and a final sanding.
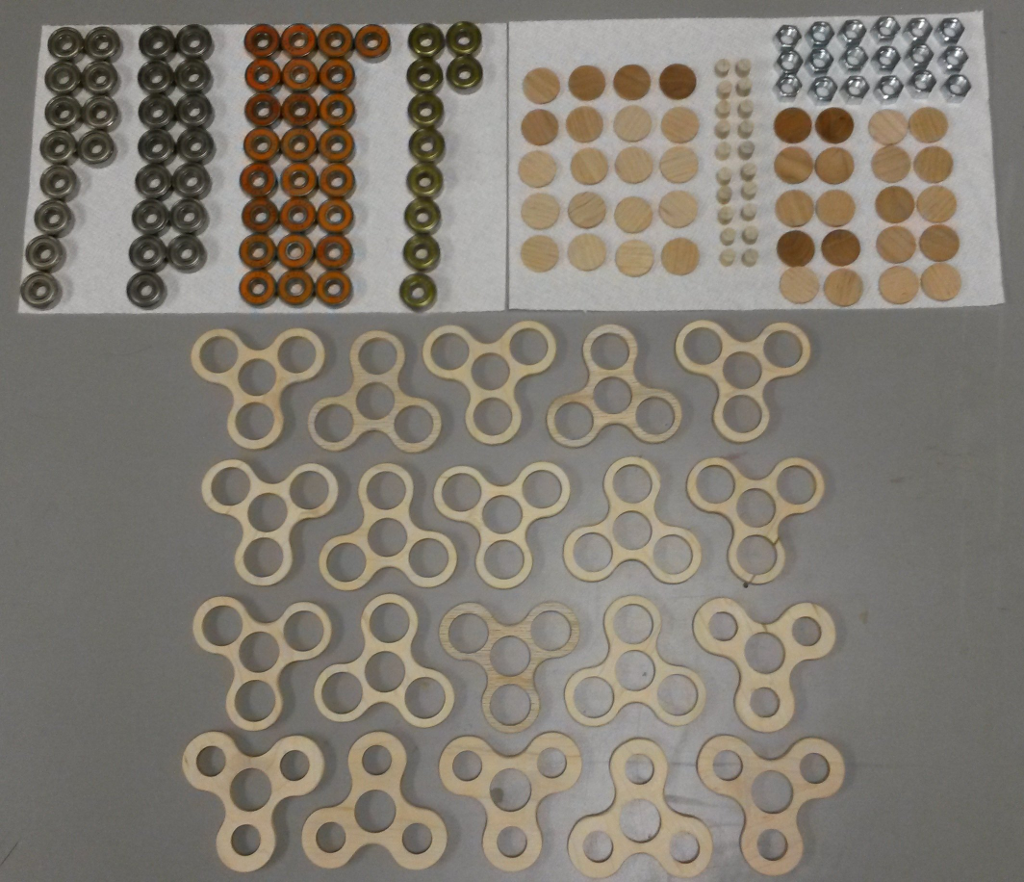
Here are all the parts knolled and ready to assemble.
Use contact cement to attach bearings or bolts, and axles. The brush that comes in the contact cement bottle is too big so we poured out a little glue and applied with a nail. Use wood glue to attach buttons to the axle using a clamp.
The finished product.
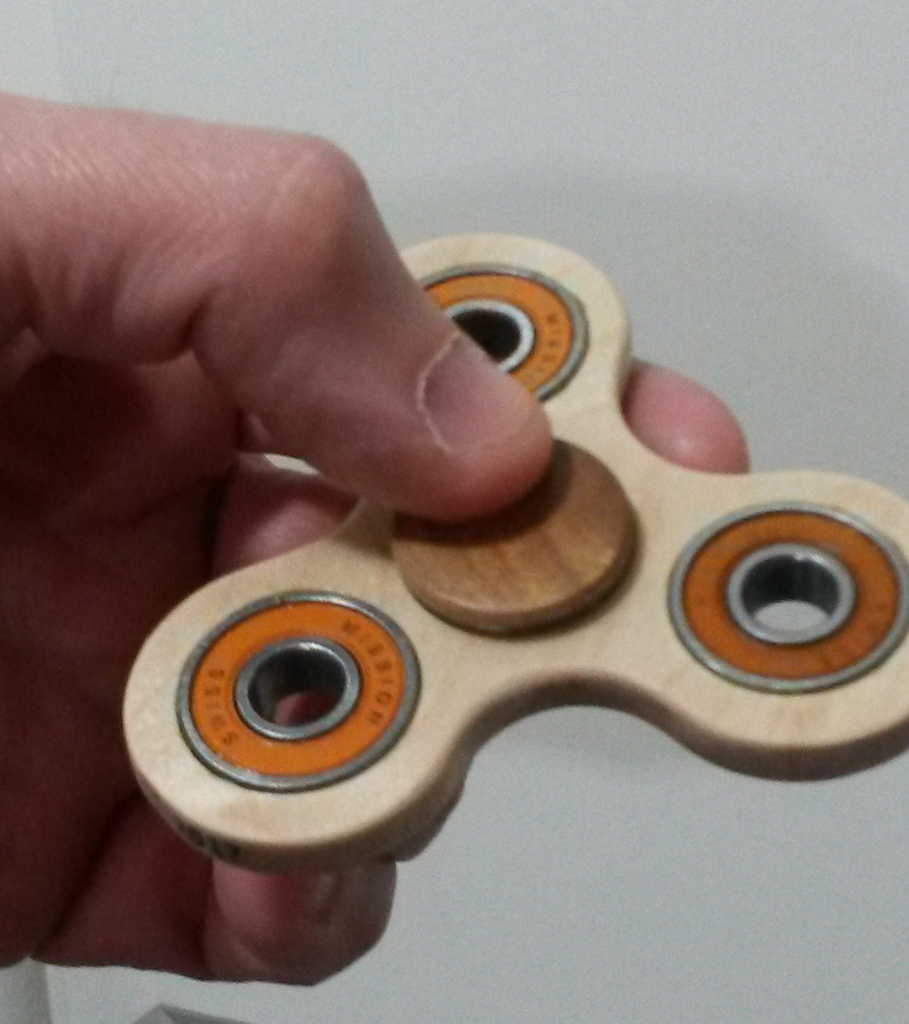
Using different woods for the body and buttons and with different kinds of bearings or bolts almost all of the twenty spinners are unique.